
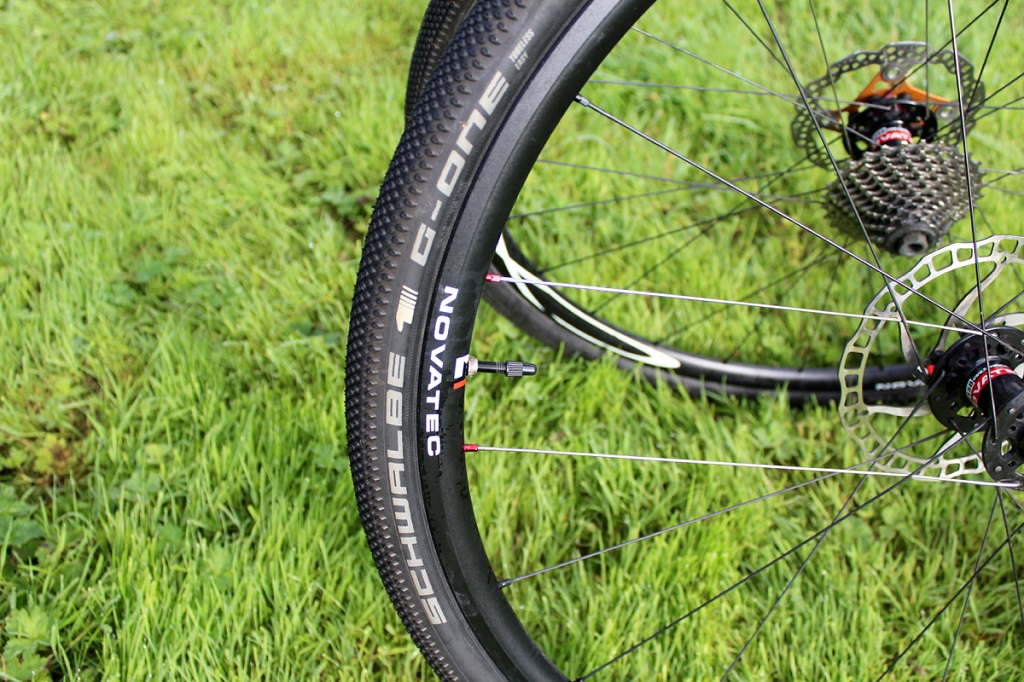
You’ve pumped the tyre for the third time. It’s still soft the next morning. There’s sealant on your garage floor and your patience is gone. You’re starting to wonder if this whole tubeless thing is worth it.
It is. But the setup has specific failure points nobody tells you about upfront. Miss any one of them and you spend your Sunday chasing air instead of riding. This guide covers the real process — rim tape width, sealant volumes, blast pump requirements — so you get it right the first time.
What You Actually Need Before You Touch the Tyre
Skipping the gear checklist is where most failed tubeless setups begin. You need more than a pump and some sealant — and knowing which items are genuinely non-negotiable saves a wasted trip back to the bike shop mid-project.
First, confirm your rim and tyre are actually tubeless-ready. Look for “TLR” (Trek’s designation), “TCS” (Schwalbe), or “UST” (the older universal standard) printed on the rim sidewall. If none of those are there, standard clincher rims can sometimes work with heavy tape, but the setup is less reliable and shouldn’t be run above 80 PSI. Don’t start without knowing what you’re working with.
Here’s the complete kit:
- Tubeless rim tape — Stan’s NoTubes Yellow Tape (available in 21mm to 33mm widths) or Gorilla Tape as a budget alternative
- Tubeless valve stems — Presta style with a removable valve core; the removable core is non-negotiable for injecting sealant later without dismounting the tyre
- Sealant — 60ml minimum per wheel for road, 90–120ml for MTB
- A blast pump or compressor — the Bontrager TLR Flash Charger ($90) and the Specialized Air Tool Blast ($75) are the two most popular; a standard floor pump cannot generate enough airflow for initial bead seating
- Plastic tyre levers only — metal levers cut rim tape and gouge rim beds; throw them out
- Dish soap or tubeless mounting fluid — bead lubrication is not optional
- A syringe — for clean sealant injection through the valve without making a mess
- A valve core tool — costs around $6, lets you top up sealant later without removing the tyre
Have old rags and paper towels ready before you start. Sealant goes everywhere during the first inflation — on the tyre, the rim, your hands, whatever is next to the wheel. Plan for it.
The valve core tool doesn’t sound essential, but it’s the one item riders consistently wish they had bought at the start. You’ll use it to top up sealant every few months without ever dismounting the tyre. Buy one now.
Rim Tape: The Detail That Decides Everything
Rim tape is the most overlooked step in tubeless setup. A bad tape job causes slow leaks that sealant cannot fix, air escaping from around the valve base, or a tyre that holds pressure for 12 hours and then gradually doesn’t. Everything else in this guide depends on this step being done correctly.
Getting the Width Right
The tape must cover the full internal width of the rim bed and overlap slightly onto the sidewalls. Too narrow and the bead sits on exposed spoke holes — even a small gap becomes a consistent leak path that sealant can’t reliably bridge. Too wide and the tape won’t sit flat, creating bubbles underneath that fail under pressure.
Measure the internal width of your rim before buying tape. A rim with a 30mm internal width needs 33–35mm tape. Stan’s NoTubes Yellow Tape comes in 21mm, 25mm, 27mm, 30mm, and 33mm options, which covers virtually every road and MTB rim on the market. Gorilla Tape is 48mm wide — usable if trimmed, but more fiddly. On carbon rims, stick to dedicated tubeless tape. Gorilla Tape’s adhesive is aggressive and can damage carbon surfaces when removed; Stan’s tape pulls clean.
Applying It Without Creating Failure Points
Clean the rim bed with isopropyl alcohol and a clean rag. Let it dry completely — two minutes minimum. Any grease or residue left behind breaks the adhesive bond and creates air pathways under the tape.
Start opposite the valve hole. Apply the tape with consistent, moderate tension — firm enough to press into the rim channel, not so tight it stretches and thins the tape. When you complete the loop, overlap by at least 5cm. Press the tape edges into the corners of the rim channel using your thumbnail or the back of a tyre lever. Any lifted edges become air channels.
On aluminum rims with deep spoke nipple pockets, use two full layers. One layer bridges the holes adequately at first, but deforms under sustained pressure over weeks of riding. Two layers of Stan’s tape, or one layer of Gorilla Tape (naturally thicker), creates a stiffer, more durable bridge. Carbon rims with shallower spoke pockets typically need only one layer.
The Valve Hole
Pierce the valve hole from inside the rim outward using a sharp pick or the tip of the valve stem itself. The goal is a clean circular hole — no tearing, no cutting, no ragged edges. A torn hole means the tape has fractured, and you will leak from the valve base regardless of how tight you set the retaining nut.
Push the valve through from the tyre side, hand-tighten the nut against the rim, then add a quarter-turn with a valve nut tool. That’s it. Overtightening distorts the tape and creates the exact leak you’re trying to prevent. If air leaks from the valve base after your first inflation, the tape around that hole is compromised — redo it. There is no patch for that particular failure point that works reliably.
Mounting and Seating the Tyre: Do It in This Order
Sequence matters here. Do these steps out of order and you’ll either waste sealant or have to fully dismount the tyre and start over.
- Lube the bead. Coat both bead edges of the tyre with dish soap or mounting fluid. This allows the bead to slide to the rim’s outer shelf when pressure builds. Without lubrication, the bead binds in the channel and won’t pop into position regardless of how much air you throw at it.
- Seat one bead fully. Push one side of the tyre completely onto the rim by hand. This should be achievable without levers on any properly matched TLR tyre and rim combination. If it requires serious force, double-check the tyre and rim sizes — a mismatch makes the whole process punishing.
- Add sealant before closing the second bead. Pour measured sealant into the open tyre cavity. Stan’s NoTubes recommends 60ml for road and 120ml for MTB; Orange Seal Endurance uses the same volumes. More is not better — excess sealant adds rotational weight without improving puncture protection.
- Seat the second bead. Work from the valve area outward toward one side, then the other. The final 10–15cm is the tightest section on most tyres. Use a plastic tyre lever only if necessary, being careful not to punch through the tape.
- Inflate fast. Connect your blast pump, pre-charge the reservoir, and release. You’ll hear distinct pops as each section of bead seats against the rim shelf. If the tyre refuses to seat, deflate, re-lubricate, and try again. Rotating the tyre on the rim so a different section faces the valve can help on stubborn setups.
- Rotate the wheel immediately. Spin the wheel through all orientations — upright, horizontal, inverted — for two minutes. This coats every internal surface with sealant before it pools at the bottom.
- Let it rest before riding hard. Check pressure after 30 minutes; some drop is normal as sealant seals micro-gaps at the bead. Top off and leave overnight before putting the wheel under real load.
Sealant: Which Brand, How Much, and When to Refill
The sealant market has matured. These four products are what experienced riders actually use, and the differences between them are worth understanding before you buy.
| Sealant | Volume (MTB) | Latex? | Typical Lifespan | Best For |
|---|---|---|---|---|
| Stan’s NoTubes Race Sealant | 120ml | Yes | 2–3 months | XC and road — seals fast, lowest weight penalty |
| Orange Seal Endurance | 120ml | Yes | 3–6 months | Trail and enduro — longer service intervals |
| Muc-Off No Puncture Hassle | 140ml | No (synthetic) | 6+ months | Cold and wet climates — stays liquid through winter |
| Schwalbe Doc Blue Professional | 60ml (road) | Yes | 2–3 months | Road-specific, optimised for Schwalbe tyre casings |
Orange Seal Endurance is the pick for most trail and MTB riders. The 3–6 month lifespan means you’re maintaining it seasonally, not constantly. Stan’s Race Sealant seals cuts faster and keeps rotational weight down — the better option for road cyclists who care more about weight than service intervals.
Muc-Off No Puncture Hassle is the correct choice if you ride regularly through cold or wet winters. Latex sealants thicken and dry faster as temperatures drop. The synthetic formula in Muc-Off stays liquid significantly longer, which means it keeps sealing punctures in February when a latex alternative has already turned into dry, flaky film coating the inside of your tyre.
Topping Up Without Removing the Tyre
Remove the valve core with a valve core tool. Use a syringe to inject 30–60ml of fresh sealant for road, 60ml for MTB. Reinstall the core, inflate, rotate. Check sealant level every 2–3 months for latex options — insert a toothpick through the open valve core hole. Wet tip means you’re fine. Dry tip with rubbery shreds attached means top up now before your next ride, not after.
When the Tyre Still Won’t Seal
The bead won’t seat at all
Almost always an airflow problem. A standard floor pump moves too little air too slowly to push the bead out to the rim shelf before air escapes past the unseated sections. If you don’t have a blast pump, pre-inflate the tyre with a tube to set the bead shape, deflate, pull the tube, reinstall the valve stem, and then inflate tubeless. It works. It’s a workaround, but it works.
Also check bead lubrication. Dry rubber binds before it slides into position. Deflate, add more soap, work the bead with your hands around the circumference, and try again.
Air weeps from the sidewall after seating
Some slow weeping in the first five minutes is normal — rotate the wheel and watch it slow as sealant coagulates in the micro-gaps. If one specific spot keeps actively bubbling or spraying after 10 minutes, that’s either a tyre defect or an impact cut. Use a Park Tool TB-15 Plugger Kit ($20) to install a rubber plug from the outside, or patch it from the inside with a vulcanizing patch. Both hold reliably on cuts up to about 5mm.
Pressure drops gradually during rides
Two most common causes: low sealant volume and a loose valve core. A loose valve core loses air slowly enough that you don’t notice a leak at rest, but the tyre goes soft over 20–30 minutes of riding. A valve core tool and 30 seconds of tightening fixes it. If the valve core is tight, add sealant — tyres that seal fine at rest but weep under flex are almost always running too little sealant to coat the full interior under load.
The tyre burps on hard corners
Burping happens when the bead momentarily unseats on a sharp lateral impact, releasing a pulse of air. Running pressure too low for the tyre’s casing stiffness is the primary cause. For trail MTB, don’t go below 22 PSI without a tyre insert. The CushCore Pro insert ($100 per wheel) physically blocks bead unseating — heavy, but it eliminates burping entirely for aggressive riders who consistently push below the safe pressure floor.
The Honest Verdict
For road cyclists and trail mountain bikers who ride regularly, tubeless is worth the setup effort. Lower pressures, better grip, and small punctures that seal without stopping — those are real, consistent advantages you feel on every ride.
Skip it if you’re a casual rider who rarely punctures, a loaded tourer who needs flat repair to be predictable and simple, or someone with rims that aren’t TLR-compatible. A quality butyl tube in a reinforced tyre will cause less frustration per kilometre than a compromised setup on incompatible equipment. Know your use case, then commit to whichever system you choose.
| Scenario | Tubeless Worth It? | Key Reason |
|---|---|---|
| Trail MTB, riding weekly | Yes | Pinch-flat elimination, lower pressure handling |
| Road cycling, 100km+ per week | Yes | Fewer puncture stops, lower rolling resistance |
| Casual weekend rides, rare punctures | No | Setup complexity outweighs infrequent benefit |
| Loaded touring, remote routes | No | Tube-based repair is faster and more predictable |
| Non-TLR rims | No | Unreliable bead seal, pressure limits apply |
